
Last Updated on August 1, 2026 by Cliche
Ever crave a reliable pizza night, but you do not want flour all over the counter? This pizza dough method keeps it simple: let your bread machine do the kneading, and keep active dry yeast and a hot pizza stone in your back pocket for a crust that actually has chew.
I like this approach because you get consistent mixing with very little hands-on time. We are using the Love Bakes Good Cakes bread machine pizza dough recipe (updated April 23, 2026): 3 1/4 cups all-purpose flour, 1 1/3 cups water, 2 tablespoons olive oil, 1 teaspoon salt, 2 teaspoons sugar, plus a little cornmeal, garlic powder, onion powder, baking powder, and 1 1/2 teaspoons yeast.
I will walk you through the exact order to add ingredients, how to run the dough cycle, and how to shape for either a screaming-hot stone bake or a slower cookie sheet bake.
Key Takeaways
- Start with the Love Bakes Good Cakes base: 3 1/4 cups flour, 1 1/3 cups water, 2 tablespoons olive oil, 1 teaspoon salt, 2 teaspoons sugar, and 1 1/2 teaspoons yeast (their recipe update is dated April 23, 2026).
- For chewier crust, try a flour swap: 2 cups bread flour plus 1 cup semolina, with about 1 cup water, 2 teaspoons yeast, and 2 teaspoons olive oil (you are aiming for a firmer, less sticky dough ball).
- For fast, blistered pizza, bake on a fully preheated pizza stone at your oven’s top baking temperature (often 500 to 550°F) for about 6 to 10 minutes, depending on thickness and toppings.
- For a thicker, softer bake, a cookie sheet at 400°F for about 25 minutes is a steady option, especially if you load on sauce, cheese, pepperoni, and green bell pepper.
- Watch the dough early: check after 5 to 10 minutes of kneading, then add water 1 teaspoon at a time if it looks shaggy, or add flour 1 tablespoon at a time if it smears on the pan walls.
- For make-ahead, refrigerate dough for up to 48 hours, or freeze for best quality for about a month (label portions and dates so you do not thaw more than you need).

Gather Your Ingredients and Tools for Pizza Dough
You do not need a fancy setup, but you do need the right basics: flour, yeast, salt, olive oil, and a plan for heat.
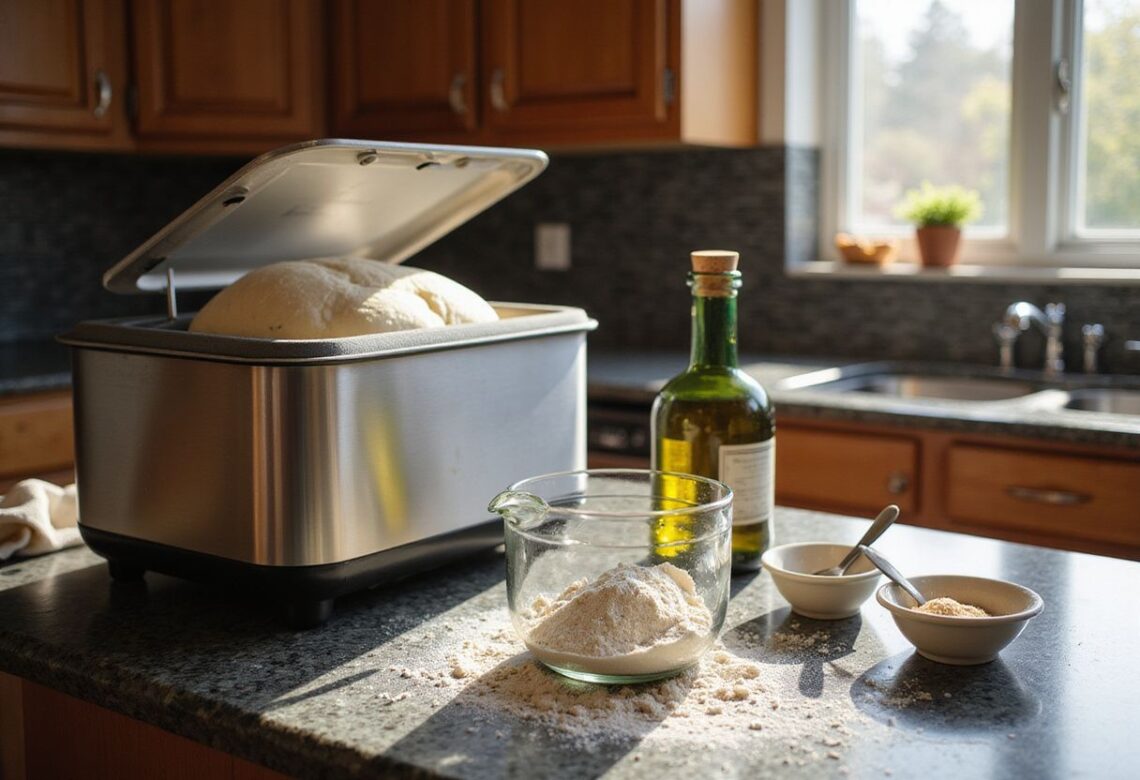
If you own the zojirushi home bakery virtuoso® breadmaker, you are in great shape. Zojirushi lists the Virtuoso Plus line as a 2-lb horizontal-loaf machine with dual kneading blades, which is exactly the kind of capacity that handles a solid bread machine pizza dough batch without struggling.
Must-have ingredients for homemade pizza
This is the ingredient set that works well in a typical two-pound bread machine dough cycle.
- Water: Start with 1 1/3 cups water for the Love Bakes Good Cakes version. Keep a tablespoon nearby for tiny adjustments once the kneading starts.
- Fat: Use 2 tablespoons olive oil for tenderness. Olive or vegetable oil both work if you are out of olive oil.
- Sweetener and salt: Add 2 teaspoons sugar and 1 teaspoon salt. Salt helps with flavor and also keeps yeast from racing too fast.
- Flour: Use 3 1/4 cups all-purpose flour for the base dough. If you want more chew, swap in bread flour for part of the total flour.
- Yeast: Use 1 1/2 teaspoons active dry yeast, or use Fleischmann’s® rapidrise® instant yeast (or fleischmann’s® bread machine yeast) if you want a quicker rise inside the machine.
- Flavor add-ins (optional): 1 tablespoon cornmeal, 1 teaspoon baking powder, 1/4 teaspoon garlic powder, and 1/4 teaspoon onion powder give a mild, family-friendly flavor.
- Toppings: Pizza sauce, shredded cheese, pepperoni, and sliced green bell pepper are classic. A good starting point is about 1/2 pound pepperoni total for two pizzas.
Tools that make pizza night calmer
- Measuring tools: Measuring cups and spoons work, but a kitchen scale makes your bread machine pizza dough recipe more repeatable.
- Pan plan: Have a pizza pan ready for a thicker bake, or a pizza stone if you want faster browning. Dust the surface lightly with cornmeal if sticking is a problem.
- Shaping helpers: Parchment paper and a bench scraper help you move dough without tearing it.
Sharing and saving (quick note)
If you share photos on instagram or facebook, it is kind to credit the original creator (Love Bakes Good Cakes). For your own notes, jot the version you liked, your name, and an email in your recipe file so you can find it later. This is also helpful if you are comparing variations from Trish – Mom on Timeout or Erin Huffstetler.
Bread maker setup and preparation
Set your bread machine on a clean counter and get everything measured before you open the lid.
- Check your manual for ingredient order. Many machines prefer liquids first, then dry ingredients, with yeast added last so it stays dry until mixing starts.
- Measure the water, sugar, salt, and olive oil into the bread pan.
- Add cornmeal, then add your all-purpose flour (or your bread flour and semolina mix if you are doing the chewier crust).
- Sprinkle seasonings (garlic powder and onion powder) and baking powder on top of the flour.
- Make a small well in the flour and add yeast so it does not touch the water right away.
- Start the dough cycle and watch the first 5 to 10 minutes of kneading. You want a soft, slightly tacky ball that clears the sides of the pan.
- If the dough looks dry and ragged, add water 1 teaspoon at a time. If it looks like thick batter, add flour 1 tablespoon at a time.
- When the cycle ends, move the dough to a lightly floured board, cover, and let it rest before shaping.
- Cool the pan, then wrap and refrigerate or freeze any extra dough. Think of that label as a vote for future-you on a busy weeknight.
Step-by-Step Process to Make Pizza Dough
Your bread machine does two jobs for you: it kneads and it manages the first rise.
All you really have to do is load the ingredients correctly, then check the dough early so you can fix hydration before it becomes a headache.
Adding ingredients to the bread maker
Follow your machine manual, but this order works for a lot of two-pound bread machine models.
- Add liquids first: water, olive oil, then sugar and salt (keep salt away from the yeast if your pan is small).
- Add cornmeal, then add flour. If you are doing the semolina variation, add your bread flour and semolina as your “flour layer.”
- Sprinkle baking powder and seasonings over the flour layer.
- Add the yeast last, on top, in a small dip in the flour so it stays dry until kneading starts.
- Start the dough cycle and set a timer for 7 minutes so you will not forget to check the texture.
- At the check, look for a smooth ball that clears the pan walls. Adjust with tiny amounts of water or flour until it looks right.
Selecting the right settings and cycle
Choose the dough cycle (or pizza dough cycle) and select the two-pound option if your machine asks for size.
- Do not pull the dough early. Let the machine finish kneading and the first rise.
- If your model has a “rest” phase built in, let it happen. Rest makes the dough easier to stretch later.
- When the cycle ends, remove the dough and cover it for 5 to 10 minutes so the gluten relaxes.
- If you are baking later, lightly oil the dough, cover, and refrigerate.
Quick accuracy tip (cups to grams)
If you want a more repeatable crust, weighing flour helps a lot. King Arthur Baking lists 1 cup of all-purpose flour as 120 grams, so 3 1/4 cups lands around 390 grams, depending on how you scoop and level.
Tips for Perfecting Your Pizza Dough
Small tweaks make a big difference in a bread machine, mostly because the machine cannot “feel” the dough the way your hands can.
So your quick dough check, plus a good baking temperature plan, does most of the work.
Adjusting hydration levels
Plan to check the dough after the first 5 to 10 minutes of kneading.
- Too dry: The dough looks shaggy, with flour stuck in corners. Add water 1 teaspoon at a time.
- Too wet: The dough smears on the pan and will not form a ball. Add flour 1 tablespoon at a time.
- Just right: A smooth ball forms, it feels soft, and it clears the pan walls while it kneads.
- Weather tip: On very humid days, you may need a touch more flour. On very dry days, you may need a touch more water.
Stone, steel, or cookie sheet?
If you want faster browning, put your pizza on a hot surface that can deliver heat into the crust.
| Baking surface | Best for | Preheat plan | Time range |
|---|---|---|---|
| Pizza stone | Crisper bottom and faster bake | Preheat in the oven for about 60 minutes near the top oven setting | About 6 to 10 minutes |
| Baking steel | Fastest browning and strong oven spring | Preheat in the oven for about 60 minutes, aim for a very hot surface | Often 5 to 8 minutes |
| Cookie sheet or pizza pan | Thicker, softer homemade pizza | Preheat the oven, but the pan itself does not need an hour-long preheat | About 20 to 25 minutes |
A July 2026 King Arthur Baking test notes that a steel transfers heat to the dough faster than stone, and they recommend preheating for at least an hour and looking for the surface to reach about 500°F.
Adding herbs and seasonings for flavor
Start light with seasonings so the dough still tastes like bread, not like a spice rack.
- Mix garlic powder and onion powder into the flour layer so they spread evenly.
- Brush the shaped dough lightly with olive oil before sauce. This helps the crust brown and can keep the center from getting soggy.
- Use cornmeal under the dough if it sticks to your pizza pan or peel. Semolina also works as a “little ball bearings” dusting flour.
Using and Storing Your Pizza Dough
Once your dough cycle finishes, you can bake right away, chill it for better flavor, or freeze portions for later.
The trick is to store it in a way that keeps the surface from drying out.
Food safety quick rule: refrigerate perishable foods within 2 hours, and keep your refrigerator at 40°F or below (per FDA and USDA food safety guidance).
Rolling and shaping the dough
Divide the dough into two balls, then rest them at least 5 minutes before shaping.
- Lightly flour the counter, then press each dough ball into a disc with your fingers.
- For a round pizza, stretch by hand or use a rolling pin to about 12 inches across (go thinner in the center, leave a slightly thicker rim).
- Brush the surface lightly with olive oil, add sauce, then cheese and toppings. Leave about a 1/2-inch rim so the edge can puff.
- For a pizza stone bake, slide the dough onto the preheated stone and bake at your highest practical baking temperature until browned and bubbling.
- For a cookie sheet bake, press dough into a lightly oiled pan and bake at 400°F for about 25 minutes, adjusting for thickness.
- If the dough fights you and springs back, cover it and rest 10 minutes, then shape again. That short pause makes stretching easier.
Freezing or refrigerating for future use
I like to prep dough ahead for busy weeks because a single bread machine batch can cover more than one homemade pizza night.
- For the fridge: oil the dough ball lightly, cover it well, and refrigerate up to 48 hours. Let it sit at room temperature until it feels relaxed before shaping.
- For the freezer: portion the dough first, wrap tightly, then freeze. King Arthur Baking suggests freezing pizza dough for up to about a month for best quality.
- Label each portion with the date and “one pizza” or “two pizzas” so you do not thaw more than you need.
- Thaw overnight in the fridge, then rest on the counter for 30 to 60 minutes before stretching.
Conclusion
If you want pizza night to feel easy again, this pizza dough method is a solid place to start. Your bread machine does the messy part, the kneading and the first rise.
The Love Bakes Good Cakes bread machine pizza dough recipe (updated April 23, 2026) is a friendly baseline: water, olive oil, sugar, salt, flour, and yeast, plus a few small add-ins like cornmeal and seasonings.
If your first batch is not perfect, do not overthink it. Just watch the dough during the first 5 to 10 minutes of kneading and make small hydration fixes. Those teaspoon and tablespoon tweaks are what turn “fine” into “wow, make this again.”
Then pick your bake style based on your kitchen.
For quick browning, preheat a pizza stone hard and bake hot. For a thicker homemade pizza on a pizza pan or cookie sheet, go a little lower and a little longer.
Want more chew?
- Swap in bread flour, or try a bit of semolina, and keep your salt and olive oil steady so the dough still handles well in the dough cycle.
- Last tip: label your portions, chill what you will use soon, and freeze what you will not.
That one step keeps your next pizza night from turning into takeout.
Read more recipe articles at ClichéMag.com
Images provided by Deposit Photos, BingAI, Adobe Stock, Unsplash, Pexels, Pixabay Freepik, & Creative Commons. Other images might be provided with permission by their respective copyright holders including AI generators.