

Last Updated on October 25, 2026 by Cliche
Preparing your roof for winter means inspecting and repairing shingles, clearing gutters, sealing flashing, improving attic insulation and ventilation, and trimming branches. These steps ensure you know how to Prepare Your Roof For Winter effectively.
Winter roof maintenance works best when I start before the first freeze, while a roof inspection can still uncover small issues that lead to water damage, ice dams, and damaged roof decking.
I use this 7-step plan to help Pennsylvania homeowners protect shingles, soffits, fascia, siding, and the attic before snow and freezing rain arrive.
By following these simple guidelines, you can easily Prepare Your Roof For Winter and safeguard your home against the harsh conditions ahead.

Step 1: Clean Your Gutters and Downspouts
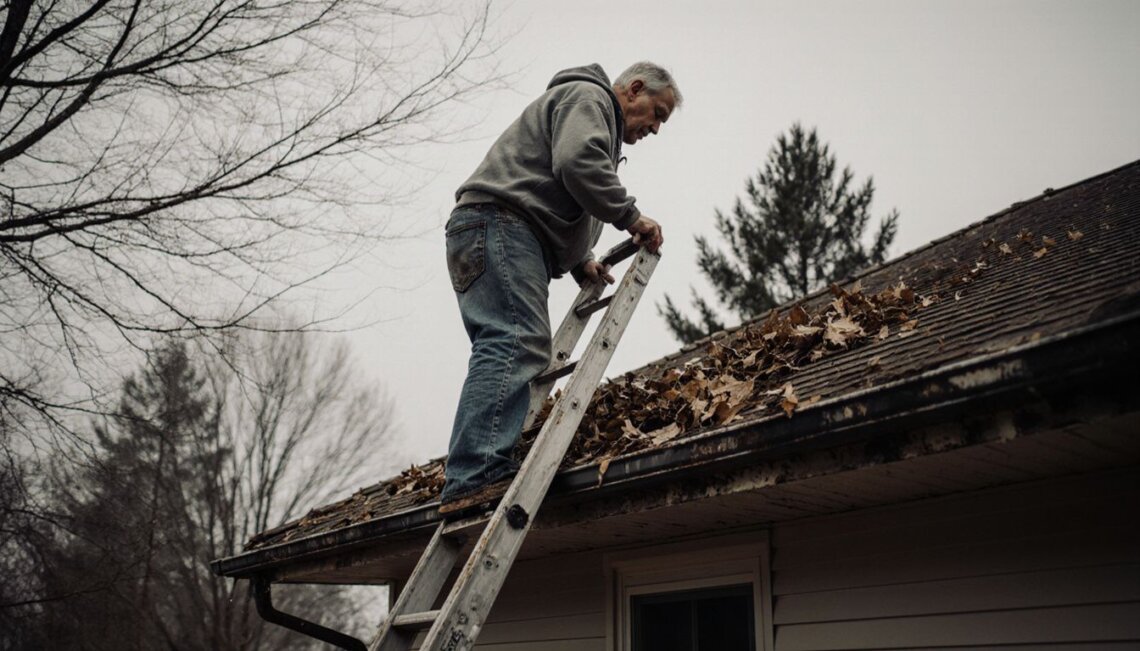
Gutter cleaning should happen before the first freeze and again after the last major leaf drop. Clear gutters and downspouts give rain and snowmelt a path away from the roof edge, siding, and foundation.
Why should I clean gutters and downspouts before the first freeze?
Gutters and downspouts should be clean before freezing weather so snowmelt can drain instead of pooling and freezing near the eaves.
Leaves, pine needles, sticks, and roof granules can trap water in the trough. Frozen water expands, which can strain gutters, loosen fasteners, and push moisture toward soffits and fascia.
The Pennsylvania Insurance Department advises homeowners to clean gutters and downspouts because blocked drainage can lead to water damage, mold, pests, and structural issues. I also look for loose gutter sections, disconnected downspout elbows, and discharge points that empty too close to the house.
- Remove leaves and debris by hand or with gutter services.
- Flush each downspout with a garden hose before temperatures fall below freezing.
- Check that downspouts direct water away from the foundation.
- Use a firmly braced ladder with rubber safety feet, and stay off the roof when possible.
How do clogged gutters contribute to ice dams?
Clogged gutters can worsen ice dams by holding meltwater at the roof edge, where it freezes and blocks drainage.
An ice dam forms when snow melts on a warmer upper roof, runs downhill, and refreezes at the colder eaves. Water then collects behind the ice and can work under roof shingles, causing roof leaks, wet insulation, and ceiling stains.
Trapped water can form ice dams, but clogged gutters are only part of the problem. I treat repeated ice damming as a sign to check attic insulation, air leaks, and attic ventilation too.
“I keep my gutters clean to keep water moving and ice dams away.”
Step 2: Inspect and Repair Damaged or Missing Shingles
Roof shingles need attention before winter because wind, snow, and freeze-thaw cycles can turn a small opening into a leak. I inspect from the ground first, then call a roofing contractor for steep, high, icy, or unsafe areas.
How do I identify damaged or missing shingles?
Damaged roof shingles often show curling, cracking, missing tabs, loose edges, or exposed nail heads.
Granules collecting in gutters and downspouts can also point to shingle wear. I check ridge caps, roof valleys, chimney areas, and the attic for water stains, damp insulation, or daylight around penetrations.
The National Roofing Contractors Association lists cracked, warped, or missing shingles, loose seams, failing flashing, and excess granules as warning signs found during seasonal roof maintenance. Early roof repair helps protect roof decking before winter storms arrive.
Do I need an ice barrier when replacing roof shingles?
An ice barrier is often needed during a roof replacement in Pennsylvania where local code requires protection against water backing up at the eaves.
An ice barrier during shingle replacement adds a waterproof layer beneath the roof covering. It helps protect vulnerable areas when ice or wind-driven water gets past the outer shingles.
Pennsylvania code guidance calls for an ice barrier in areas with a history of ice forming along eaves and backing up water. The barrier must extend at least 24 inches inside the exterior wall line, so I ask the contractor how the local requirement applies to my home.
For asphalt shingle installation, I also ask about compatible underlayment, flashing, and fastening. Duration series shingles with SureNail fastening have manufacturer installation instructions that a qualified installer should follow to protect roofing warranties.
“I ask a local roofing contractor to confirm ice barrier placement at eaves, valleys, and roof-wall connections before work begins.”
Step 3: Check and Seal Flashing Around Roof Openings
Flashing protects the joints where shingles meet chimneys, vents, skylights, walls, and other roof openings. A small flashing gap can let water bypass otherwise sound residential roofing.
- Check flashing around vents, chimneys, and skylights for cracks, gaps, rust, lifted edges, or missing sealant.
- Look for loose fasteners, but do not drive nails through exposed flashing unless a roofing contractor confirms the repair method.
- Inspect chimney flashing and nearby mortar before scheduling chimney sweeping and services.
- Check skylight flashing carefully, since skylight, window, and siding services may be needed if trim or surrounding materials show water damage.
- Use manufacturer-approved materials for asphalt, metal roof installation, slate roof installation, or flat roof installation (TPO).
- Call a roofer if flashing has separated from masonry, roof shingles, or siding.
Older homes in Allentown, Stroudsburg, and Mt. Pocono often have several roof penetrations and weathered masonry details. I avoid covering a failed flashing joint with random caulk, because the repair needs to shed water in the right direction.
Step 4: Trim Overhanging Branches Near the Roof
Tree trimming lowers the chance that snow-loaded, dead, or rubbing branches will damage roof shingles during a winter storm. Branches also drop leaves into gutters and can scrape away protective shingle granules.
- Inspect trunks and limbs for cracks, rot, cavities, leaning, or dead wood before winter.
- Prune branches that touch or hang directly over the roof.
- Remove weak limbs that could break under snow and ice weight.
- Keep branches away from gutters so gutter cleaning lasts longer.
- Check trees after major windstorms before hanging holiday lights.
- Hire a qualified tree trimming professional for large limbs, tall trees, or branches near utility lines.
The Pennsylvania Insurance Department includes trimming branches and removing dead limbs in its winter preparation guidance. I treat a branch over the roof as both a roof repair risk and a home safety issue.
Step 5: Verify Proper Attic Ventilation
Attic ventilation helps keep the roof deck colder in winter, which reduces uneven snow melt and lowers the risk of ice damming. Proper airflow also helps moisture leave the attic instead of collecting on framing and insulation.
How much attic ventilation does my roof need?
Attic ventilation commonly uses 1 square foot of net free vent area for every 150 square feet of insulated ceiling, unless local code or the roof design calls for a different amount.
Ridge vents let warmer attic air leave near the peak, while soffit vents bring cooler air in at the eaves. A balanced system needs a clear path between them, so insulation must not block the soffit openings.
Attic ventilation can prevent ice dams when it works with air sealing and insulation. I look for crushed baffles, covered soffit vents, disconnected ductwork, and frost on the underside of roof decking.
Complex roofs with valleys, dormers, skylights, and multiple levels can be harder to ventilate. A roofing contractor can calculate vent area and check whether ridge vents, soffit vents, or another approved setup fits the roof design.
Step 6: Add or Upgrade Attic Insulation
Attic insulation slows heat loss from living spaces into the attic, helping the roof stay closer to outdoor temperature. That reduces the snowmelt pattern that feeds ice dams.
How much attic insulation do I need for my climate?
Pennsylvania homes commonly need attic insulation in the R-49 to R-60 range, depending on the home’s climate zone and the insulation already in place.
R-value measures how well insulation resists heat flow. Energy Star guidance recommends R-60 for uninsulated attics in climate zones 5 and 6, while attics with 3 to 4 inches of existing insulation may need added insulation to reach R-49.
| Insulation type | Typical check | What I look for |
|---|---|---|
| Fiberglass batts | Gaps and compression | Batts should fit snugly without blocking soffit vents. |
| Blown-in cellulose | Even depth | Coverage should not be thin near the attic edges. |
| Existing insulation | Moisture or pests | Wet, stained, or disturbed insulation needs a moisture check before adding more. |
Attic insulation works best after air leaks around light fixtures, plumbing stacks, wiring holes, and attic hatches are sealed. I keep insulation away from heat-producing fixtures unless they are rated for insulation contact, and I hire an insulation contractor when access or wiring makes the job unsafe.
Step 7: Schedule a Professional Roof Inspection
A professional roof inspection before winter can find roof repair needs before snow and ice hide the problem. I schedule roof inspection services in early fall whenever possible, before contractor calendars fill up and before the first freeze.
A roofing contractor can inspect roof shingles, flashing, valleys, ridge caps, gutters, downspouts, soffits, fascia, attic ventilation, and visible roof decking concerns. A contractor can also check whether an ice barrier, fortified roofing upgrades, or a total protection roofing system makes sense during a roof replacement.
For Pennsylvania homeowners, I verify contractor registration, ask for written estimates, compare more than one bid, and check references before signing. The Pennsylvania Attorney General notes that contractor registration is required, but registration alone does not guarantee work quality.
- Ask what the roof inspection includes and excludes.
- Request photos of damaged roof shingles, flashing, or structural damage.
- Ask whether roof repair can wait until spring or needs attention before winter.
- Confirm who will handle permits if the repair requires them.
Professional help matters most for steep roofs, deep snow, thick ice, chimney work, skylights, and suspected roof leaks. I never use sharp tools, hot water, or a heat gun to remove ice dams because those methods can damage roofing materials.
Conclusion
Winter roof maintenance protects my home by dealing with drainage, roof shingles, flashing, trees, attic ventilation, and attic insulation before freezing weather begins.
I follow the 7 steps: clean gutters and downspouts, inspect shingles, check flashing, trim trees, improve attic ventilation, add insulation, and schedule a roof inspection.
A little winter preparation can help prevent ice dams, roof leaks, water damage, and structural damage when Pennsylvania weather turns cold.
Read more home and garden articles at ClichéMag.com
Images provided by Deposit Photos, BingAI, Adobe Stock, Unsplash, Pexels, Pixabay Freepik, & Creative Commons. Other images might be provided with permission by their respective copyright holders including AI generators.


