
Last Updated on June 2, 2026 by Cliche
Took a spill and spotted cuts or paint chips? This guide on How To Clean And Care For Bicycle Scrapes shows simple steps that protect your skin and your bike. Car wax can hide light scratches on glossy frames, and smart wound care helps your body heal.
You will learn quick wound care for abrasions and road rash, plus frame cleaning, touch up paint, and prevention. Clear steps keep infection risk low and keep rust away. Let’s get you rolling again.

Cleaning and Treating Body Scrapes
Road rash is a large scrape caused by sliding on pavement. Fast, gentle cleaning lowers infection risk and speeds healing. Basic steps from groups like the American Red Cross favor soap and water first.
Wash the wound with soap and water
Start with a simple wash. Soap and water clear germs and grit without stinging as much as harsh chemicals.
- Rinse the scrape under running tap water. Use mild soap and your clean fingers to loosen dirt and grease.
- Let a steady stream do most of the work. Flushing first often removes sand and tiny stones without digging.
- Skip strong antiseptics during this first wash. Mild soap with running water is the safer first step.
- After rinsing well, pat dry with clean gauze or a paper towel. Do not rub the skin.
- If you see stubborn bits, sterilize tweezers with rubbing alcohol, then lift them out with care.
- Once clean and dry, apply antibiotic ointment in a thin layer, then cover with a sterile bandage.
Remove debris with tweezers or gauze
Grit left in a scrape can lead to infection. Work slowly and stop if removal hurts or goes deep.
- Look closely for visible dirt, sand, and small stones after the wash.
- Sterilize tweezers with alcohol. Lift embedded bits from the surface, moving from the edge toward the center.
- Use clean, damp gauze to blot away fine grit that clings to the skin.
- Throw used gauze away right after use. Keep your hands and tools clean.
- If debris is stuck or the wound is deep, stop and see a clinician or urgent care.
Apply antibiotic ointment
After cleaning, a light ointment layer helps block germs and keeps the area from drying out too fast.
- Spread a thin smear of antibiotic ointment, no thick globs.
- Cover the scrape with a sterile bandage to keep out dirt and reduce friction.
- If fresh road grime gets in later, gently rewash with soap and water, pat dry, then reapply ointment.
- Change the bandage daily, or sooner if it gets wet or dirty.
- Watch for signs of infection, such as spreading redness, warmth, pus, fever, or rising pain. Seek medical care if these appear.
- Keep used dressings away from the wound area, and wash your hands before and after care.
Cover with a sterile bandage
A clean covering shields the scrape and supports healing. It also makes movement more comfortable.
- Use sterile gauze or a nonstick pad over the ointment. Tape it in place without cutting off circulation.
- Clean the skin around the scrape before applying new dressings. If possible, wear disposable gloves.
- Change the dressing when it gets damp or dirty. Moist, clean coverage helps tissue rebuild.
- Avoid tight straps that rub while you ride. The wrap should feel snug but not pinch.
- Touch only the edges of the dressing. Fresh, sterile supplies lower infection risk during each change.
Caring for Bicycle Frame Scrapes
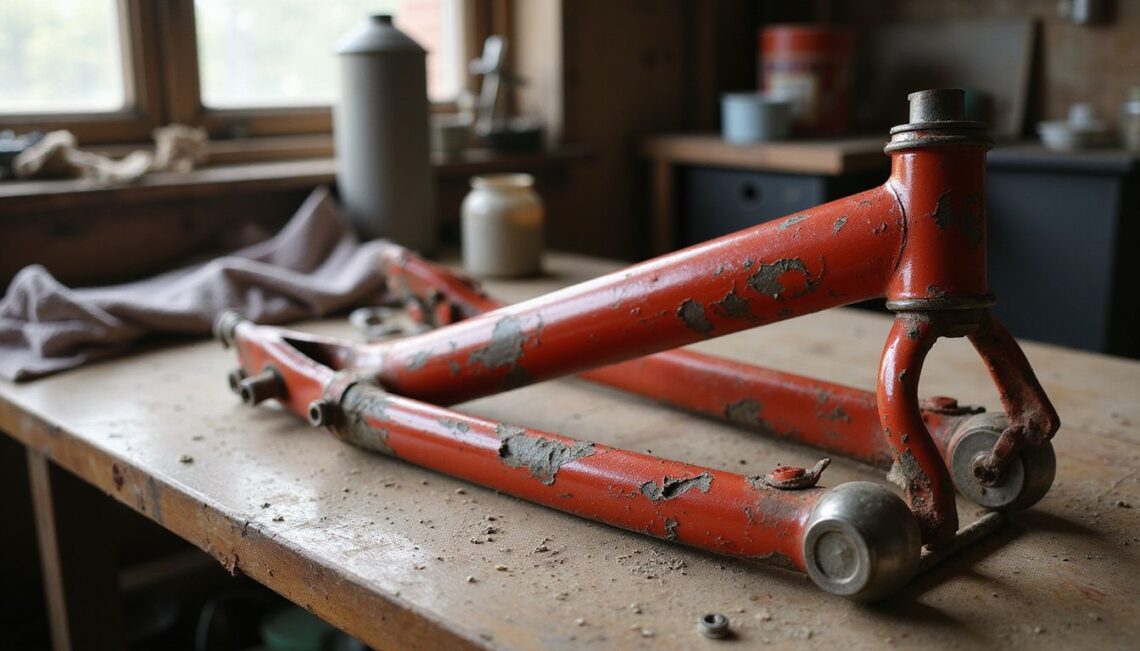
Good frame care keeps your bike looking sharp, prevents rust, and makes later bicycle maintenance easier. A few small steps now can save bigger repairs later.
Clean the damaged area with a damp cloth
A clean surface helps any repair stick. Start simple before sanding or painting.
- Wipe away loose dirt with a paper towel so grit does not grind into the paint.
- Use rubbing alcohol on a lint free cloth to lift oil and grease.
- Check for tiny metal or paint shards. Remove them with clean tweezers.
- Dry the spot fully before any sanding or touch up paint.
- Avoid harsh cleaners and abrasive pads during this first clean to protect nearby paint.
- Keep tools basic, a damp cloth, paper towels, tweezers, and a small bottle of alcohol.
Sand lightly to smooth the edges
Light sanding blends chip edges so touch up paint lays flat. It is like feathering a small dent before repainting.
- Wet sand around the chip with 1200 grit paper in a small circle, about a 20 cm area.
- Use a sanding block to keep the surface flat and avoid grooves.
- If bare metal shows, apply primer, then wet sand gently once it dries to smooth rough spots.
- After touch up paint dries, wet sand lightly again to blend edges before clear coat.
- Check your work often. Stop if you see color thinning around the repair.
- For more detail, see wet sanding and block sanding methods.
Apply touch-up paint or rust inhibitor
Fix paint chips sooner to block rust and keep frames clean. Small chips are easy wins for basic bike repair.
- After cleaning, let the area dry in the shade for a full day before paint steps.
- Pick a paint option that matches your needs, custom auto paint, standard spray paint, or low cost nail polish for tiny chips.
- Use primer on bare metal first. Apply several thin coats as directed, then let them dry.
- Pour a little paint into a cap. Apply with a fine brush or cotton swab in thin layers, letting each coat dry.
- Nail polish can work for small dings. Two thin coats, then polish gently after curing.
- An airbrush blends color well. Handheld models are affordable and help on larger or faded areas.
- Color codes vary by brand. If you have a code from a past repaint, keep it handy for a closer match.
- Treat any exposed steel with a rust inhibitor before primer. Let it dry as directed, then start your paint steps.
- Finish with a clear sealant once color looks right. Check after a week for spots that need a touch more paint.
Finish with a protective sealant
Clear coat locks in your repair and adds shine. It also helps against UV and road grime.
- Choose a clear coat that fits your plan. A basic 1K works for light protection. A two-part 2K, like 2K Spray Max, cures harder but must be mixed and used within about 48 hours.
- Follow the can directions for mixing and spray distance. Smooth, even passes beat heavy wet coats.
- Wet sand with 2000 grit paper once the color has set, then use a fade-out thinner to blend the edge.
- Let the clear coat cure for two days before polishing.
- Polish with a machine in gentle figure-eight motions to avoid swirl marks. A medium foam pad and compound work well.
- Wipe off any leftover wax or residue with a clean cloth before the final wipe of sealant.
- Consider a ride wrap on high-wear zones. I plan to add one to my Salsa Cutthroat to cut future scratches.
Tips for Preventing Future Scrapes
Small habits lower both skin injuries and paint damage. Think of this as routine frame cleaning and rider prep before you roll out.
Wear protective gear while cycling
Use a helmet, gloves, and pads to reduce scrapes and road rash. Good gear also protects your hands during a slide, which keeps you able to brake and steer after a scare.
Make protection part of your regular prevention routine. It often turns a nasty fall into a minor abrasion that needs simple wound care only.
Regularly inspect your bike for damage
Check your frame after rides with rough roads or trails. Look at the fork, head tube, top tube, and down tube for chips, cracks, and rust blooms.
After a crash left my Santa Cruz with several scratches, I added quick checks to every maintenance session. Catching a chip early prevents water from reaching the metal, which can weaken parts over time.
Refresh ride wrap or frame tape when it peels. Staying ahead of wear keeps both safety and paint in good shape.
Conclusion
This walkthrough of How To Clean And Care For Bicycle Scrapes covers both skin and frame. Clean body scrapes with soap and water, remove debris, use a thin layer of antibiotic ointment, then bandage. Treat road rash as a serious abrasion, and watch for signs of infection.
For your bike, start with alcohol cleaning, then wet sand lightly to feather edges. Use primer on bare metal, match color with thin coats, and seal with clear coat. Car wax can hide shallow scratches on glossy finishes, which stretches time between bigger touch ups.
Meet Lea Hartman, PhD in materials science with a nursing certificate and 18 years in bike repair and emergency care. Her work on road rash care and paint coatings supports these steps. She reminds riders to seek medical help for deep cuts, joint hits, heavy bleeding, or any wound that will not stop oozing after steady pressure.
Wear gloves and eye protection when working with primer and clear coats. Follow product labels and local rules for paints. Keep a small first aid kit plus a tiny touch up kit on long rides, rubbing alcohol wipes, a soft sponge, wax, and a fine brush.
DIY fixes save money, but damage that might affect frame strength needs a professional bike mechanic. When in doubt, get help. With steady wound care and simple bicycle maintenance, you will heal faster and keep your bike looking sharp
Read more health and medical articles at ClichéMag.com
Images provided by Deposit Photos, BingAI, Adobe Stock, Unsplash, Pexels, Pixabay Freepik, & Creative Commons. Other images might be provided with permission by their respective copyright holders.